

How to Add Project on Github In an Easy Way
If you’re new to GitHub and simply want to know how to add project on GitHub effectively, you’re in the right place! GitHub is a popular platform for developers to work together on projects, and copying links is a basic skill you’ll need.
In this easy and simplified guide, we’ll take you through the steps of adding project on Github and copying website links on GitHub. By the end of it, you’ll not only be able to add project on GitHub with ease but also have a better understanding of how GitHub works.
What is GitHub?

Before we begin, let’s quickly understand what GitHub is. GitHub is just a website like there are other website. Now you may ask a question if this is just a website, then what make it so popular. Why every developer is using Github and upload their project on GitHub.
It is a website where developers can keep all their code safe and organized. It’s a huge digital cabinet where they store their code files.
The best part is that it allows people to work together on projects easily. They can see and keep track all of the changes made to the code and work together as a team.
How GitHub Works
GitHub works like a big space for developers to work together on projects. Imagine it as a playground where developers can play with code.


When they want to work on a project, they first make a special area called a “repository”. The purpose of the repository is to keep all the files of the project safe and secure.
Now, here comes a funny part! Developers can work on the project together, but without messing up each other’s work.
They do this by making separate copies of the project called “branches.” It’s like having unique playgrounds for each developer.
When a developer wants to add something new or fix a problem, they work on github. Once they finish work, they show their work and changes to others using something called a “pull request”.
Finally, when everyone is happy with the changes, they bring them all together in the main playground, known as the master branch. It is like the official version of the project that everyone loves to play with.
And that’s how GitHub works! It’s a fantastic place for developers to work together, share ideas and create awesome things!
Add Your Project on GitHub
Adding your project on GitHub is a simple process that allows you to share your work with others and collaborate effectively. Here’s a step by step guide on how to add your project on GitHub.
Create a GitHub Account:
If you don’t have one already, the first step is to sign up for a GitHub account. Go to the GitHub Website github.com and click on the “Sign Up” button. Follow the instructions to create your account.
Add your email and password and follow the insruction. Verify your email. Woohoo! You have created your account on GitHub.


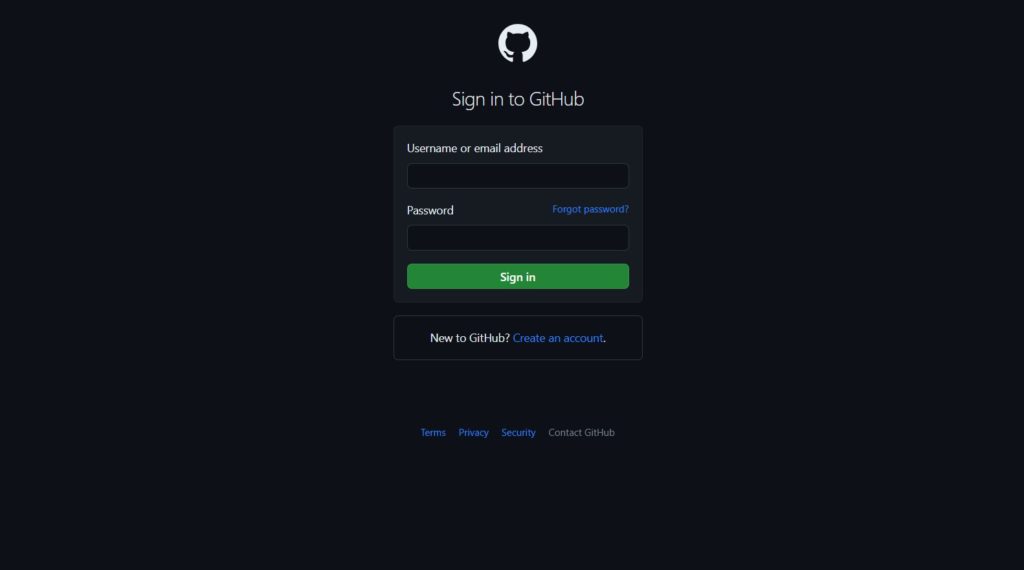
Sign in to GitHub
After creating your account, sign in to GitHub using your username and password.
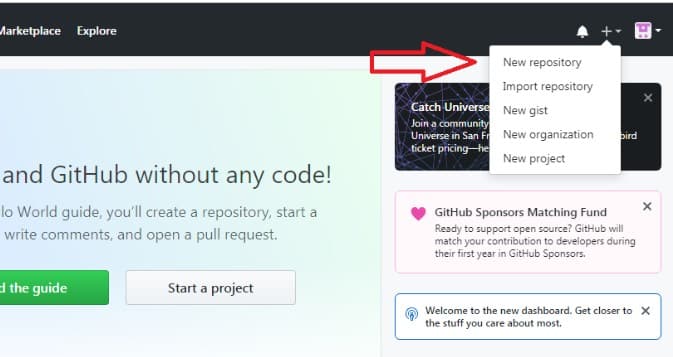
Create a New Repository
As mentioned above, A repository is just a special area that keeps the files safe and secure from malware. Repository help to secure the files the same way the plugins secure WordPress Themes.
Once you’re signed in, click on the “+” icon in the top right corner of the GitHub homepage. Then Select “New Repository”.
Name Your Repository
Give your repository a name. Choose a descriptive and meaningful name that describe the project you’re adding.
Optional: Add a Description:
You can add a brief description of your project to help others understand what it’s about.
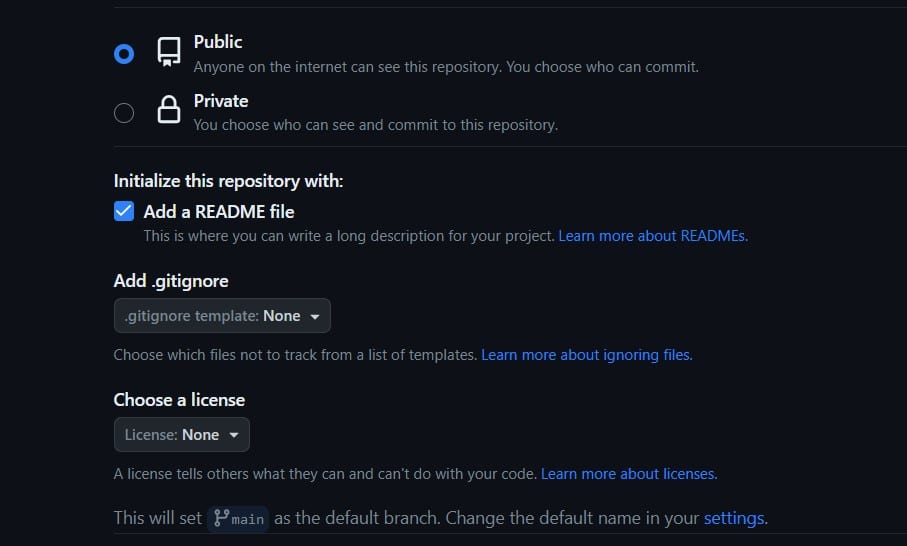
Choose Privacy Settings:
You’ll have the option to make your repository public or private. If you want others to see and collaborate on your project, select “Public.” If you want to keep it private, choose “Private” (Note: Private repositories may require a paid GitHub plan).
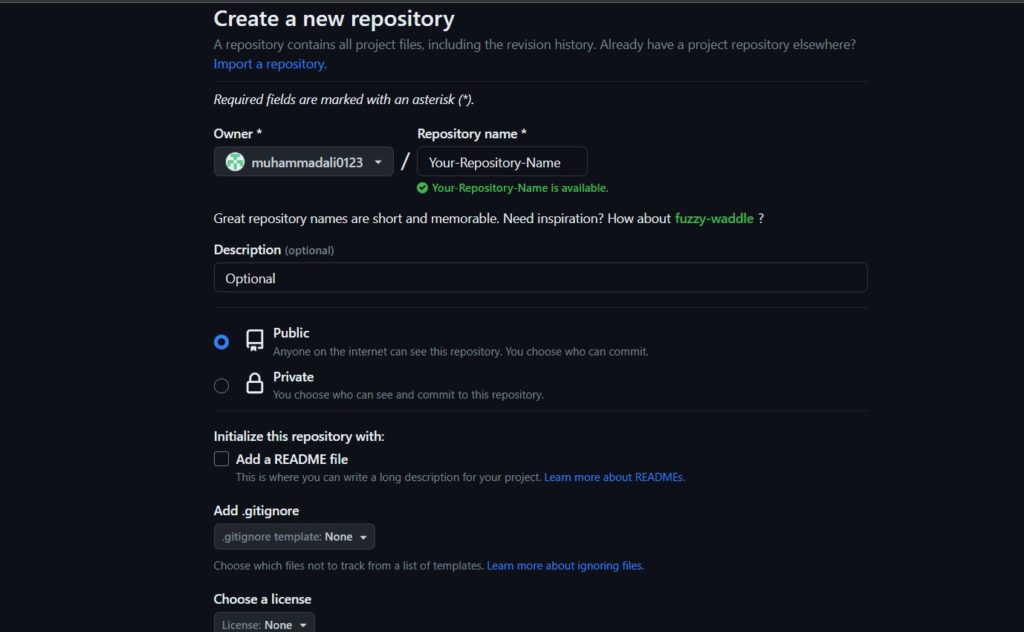
Initialize with a README:
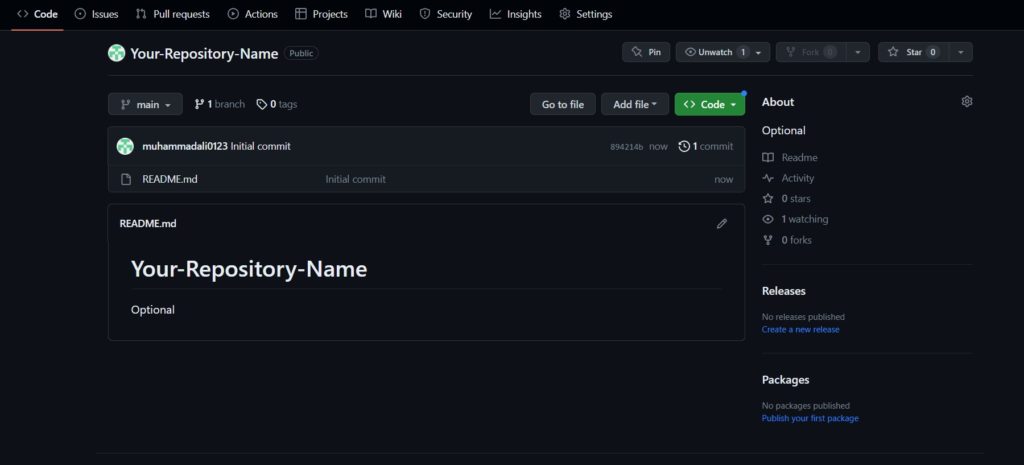
Check the box next to “Initialize this repository with a README.” This will create a README file for your project, which is a great place to provide information about your project and how others can contribute. At the bottom of the page, Click “Add Repository.”
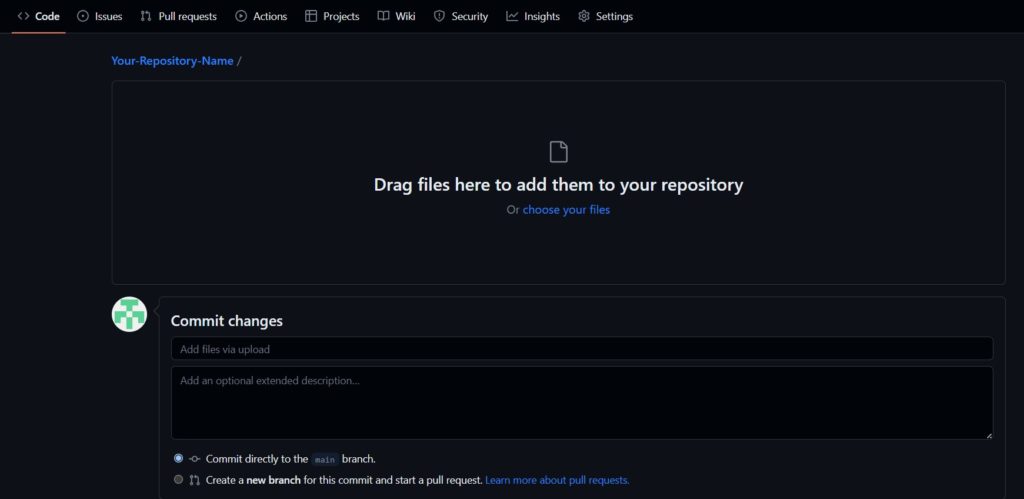
Add Files to Your Repository:
You can add your project files by dragging and dropping them into the repository page or by using the “Upload files” button. Make sure to include all the necessary files and folders for your project.
Congratulations! Your Project is now added to GitHub. You can view your repository by clicking on the repository name of your GitHub homepage.
Now that your project is on GitHub, you can share the repository link with others, collaborate with fellow developers, and manage your project’s development efficiently.
To-Do List GitHub
Here are some helpful tips to make your experience on GitHub better:
Clear and Simple Repository Names
Give Your Project a clear and descriptive name so other people can easily understand what it’s about.
Write Informative README
Write a detailed README file that explains your project, how to use it and how this can be helpful for others.
Use Branches for Development
Avoid making changes directly to the main branch. Instead, make a new playgrounds called “branches.”
Pull Requests for Collaboration
When you are ready to share your changes, ask for feedback by making a “pull request.”
Code Reviews
Ask others to review your code to make sure it’s good quality.
Use Issues for Tracking
Use GitHub’s issue tracker to keep track of bugs, feature requests and other tasks.
Version Tagging
Use version tags to mark important releases. Version tags help others easily identify stable points in your project’s development history.
Be Respectful and Supportive
GitHub is a collaborative platform which means at this platform people work in a team. So, always be respectful and supportive when you are interacting with others.