How to Speed Up WordPress Website?
Do you want to speed up WordPress Website? Fast loading pages can improve user experience, increase conversions, and reduce bounce rate. In 2020 no one has time to wait for 10 seconds for a page to load when there are so many other websites in the same niche or category which are loading under 3 seconds. So if you are able to make your website load quicker than your competitor’s website you will have a competitive advantage over your competitor which will result in more page views and consequently more conversions. In this article, I will share some useful tools and tips for WordPress Speed Optimization with you which will help you to score higher on GTmetrix, Pingdom, and Google Page Speed Insights.
You can follow the following steps with me to see the magic:
Table of Contents
Run Test for your Website Before Optimization
You can test all pages one by one on GTmetrix, Pingdom and Google Page Speed Insights but the only main difference for different pages will be image optimization and scaling. All the other optimization processes will work on a complete website collectively if you will follow this guide to Speed Up your Website.
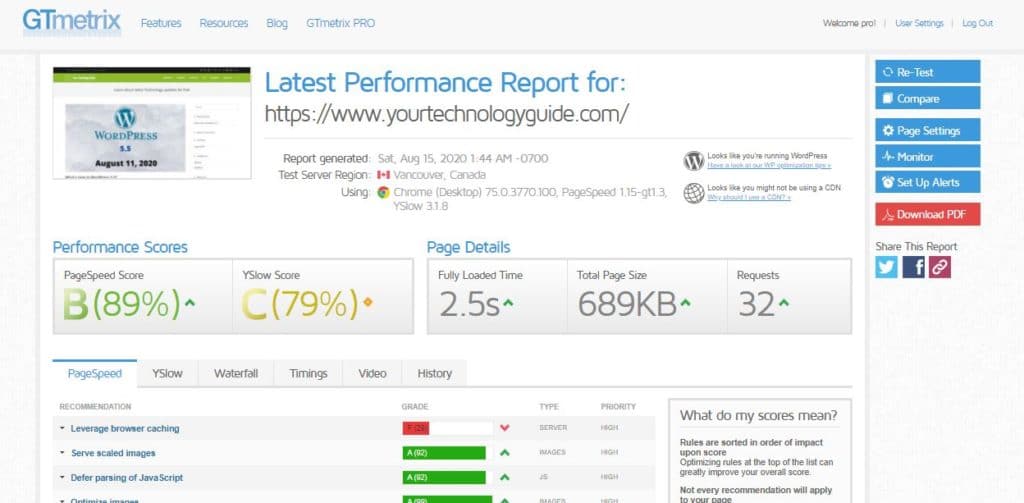
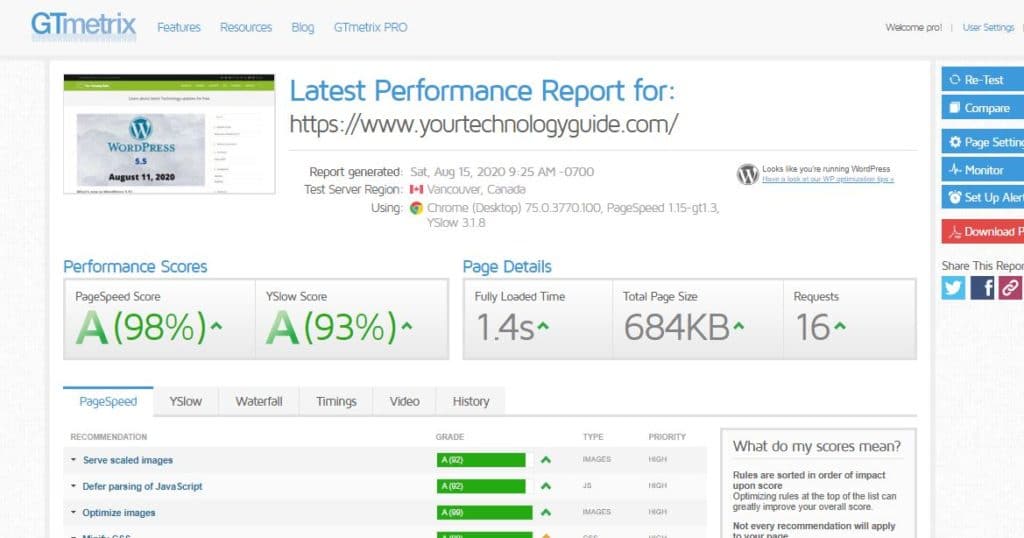
Here are the results for our Website before optimization:
GTmetrix Result Before Optimization
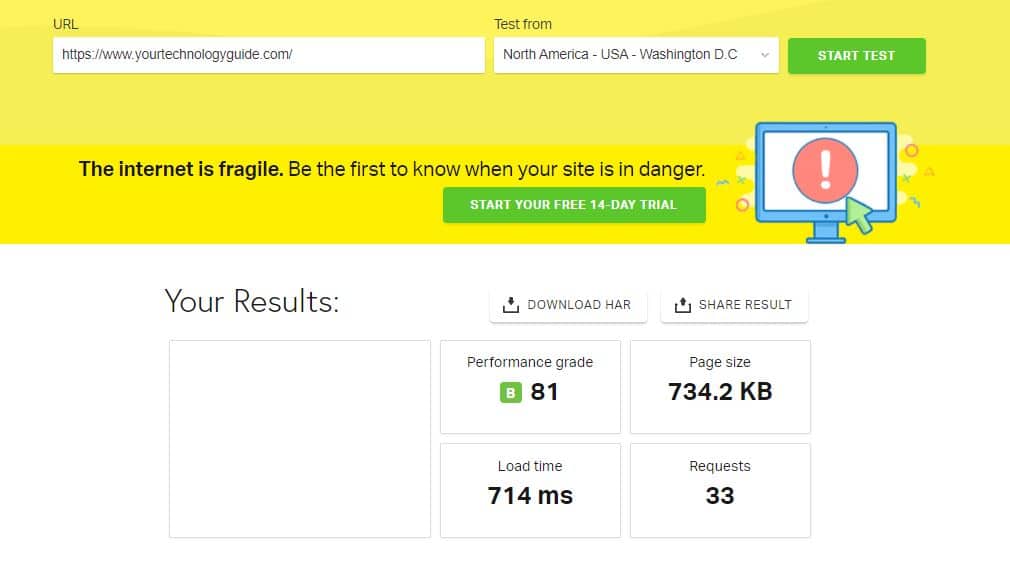
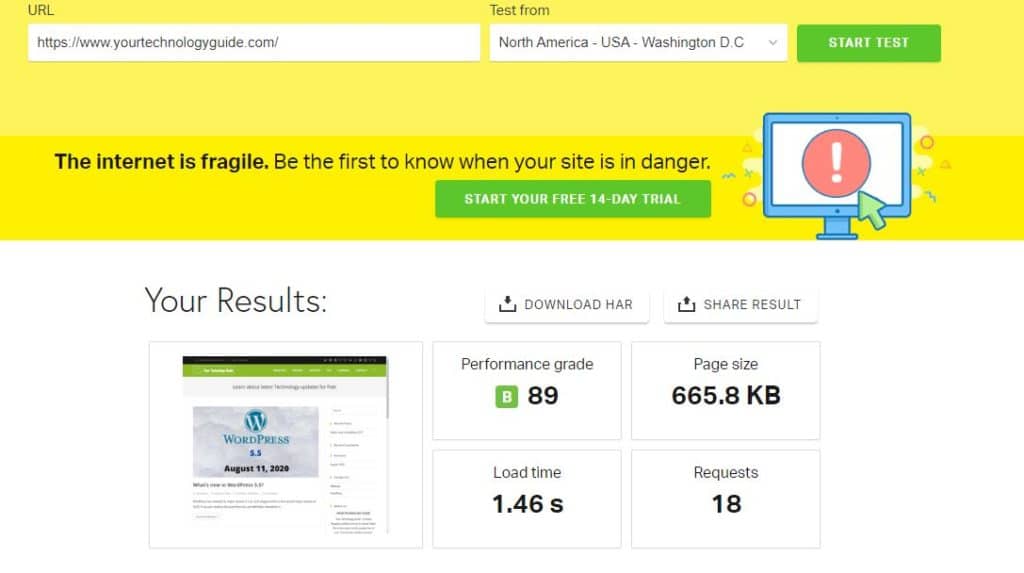
Pingdom Result Before Optimization
I don’t prefer Pingdom results for the optimization process because it only shows on-load time. You can see in the screenshot that the website is not completely loaded yet when the test on Pingdom is completed.
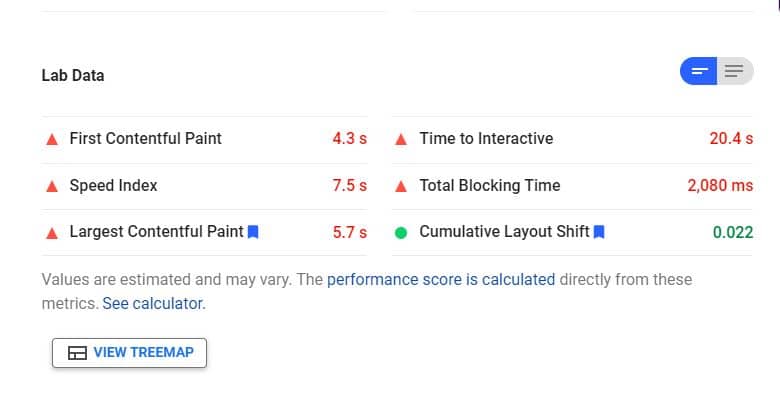
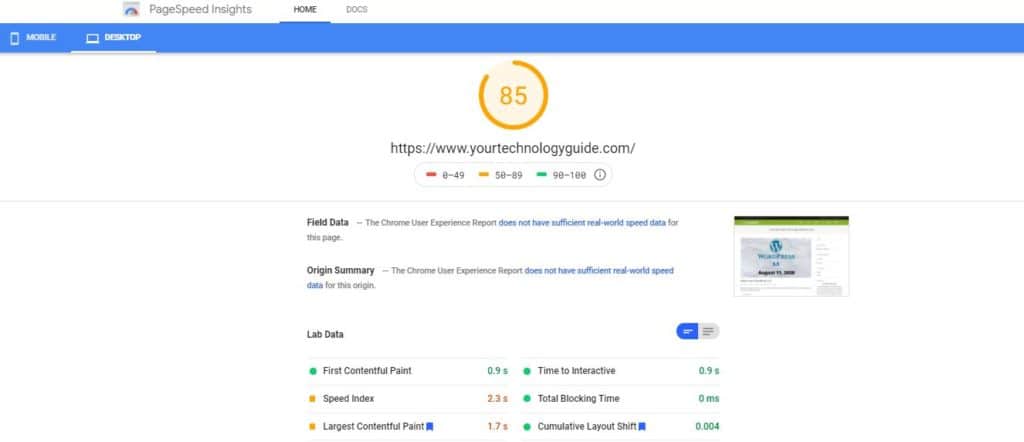
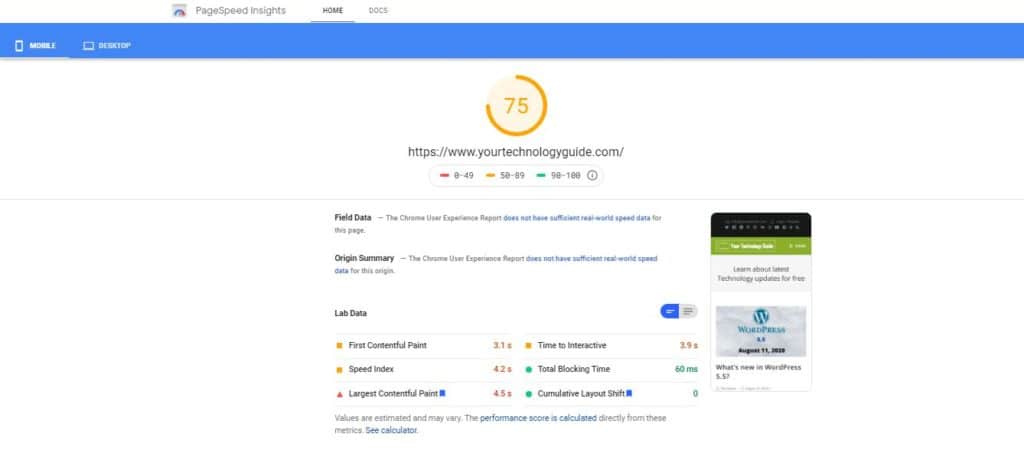
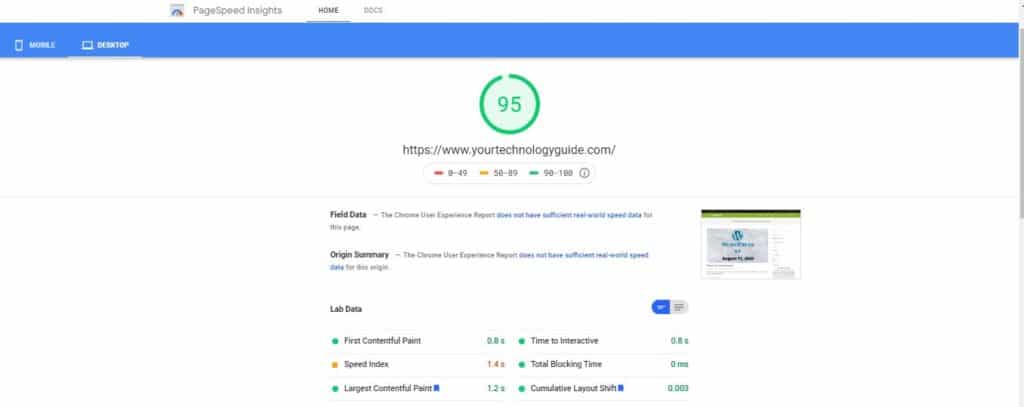
Google Page Speed Insights Results before Optimization
Result for Mobile

Result for Desktop
So after running the Test on the above 3 tools we will move towards the improvements that are needed for the website. We will follow suggestions from GTmetrix to make improvements to our website. After following GTmetrix suggestions we will see how much difference it has made on other tools as well. I will also share an alternative method that will guarantee maximum scores on Google Page Speed Insights.
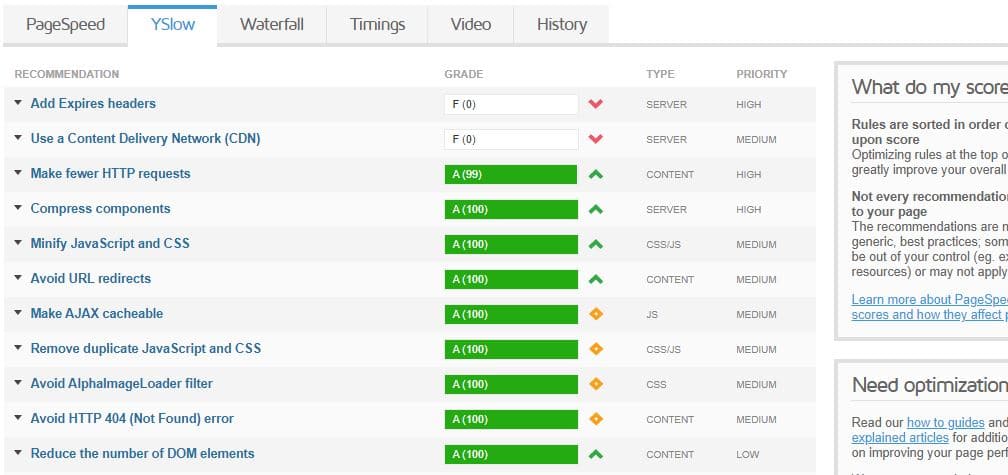
To proceed we will check details for each recommendations of GTmetrix. For our website there is only one main issue affecting Page Speed Score and that is Leverage Browser Caching
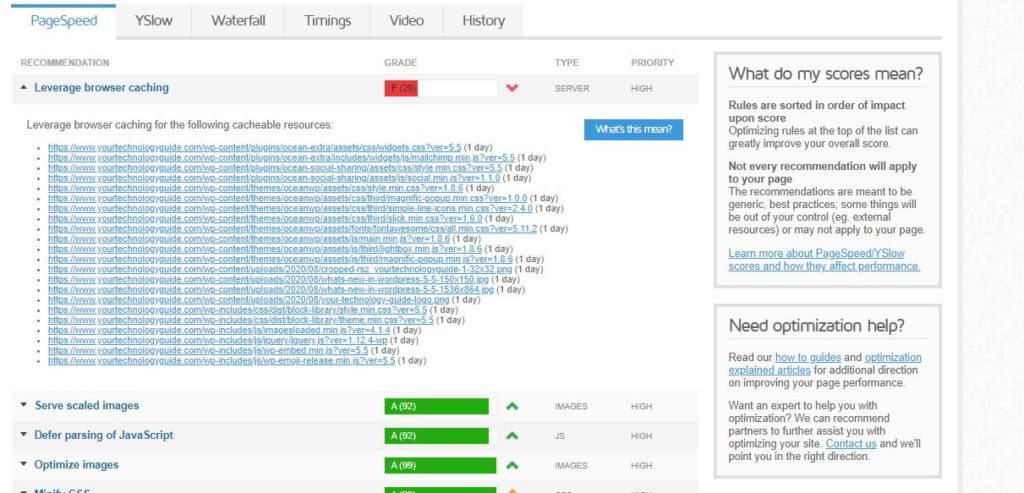
For YSlow score there are two main Recommendations:
- Add Expired Headers
- Use a Content Delivery Network
So after checking the recommendations of GTmetrix in detail you can proceed further to make necessary improvements. Improvements needed for our website are not much but I will guide you for all the improvements that you can implement on your website to stand out. Let’s Continue.
Update PHP, WordPress, Themes, and Plugins to Latest version
Make sure that your website is running the latest code. Using outdated software will make your website slow and vulnerable to security threats. Before making updates backup your complete website.
Optimize/Compress Images
There are two methods of optimizing or compressing images of your website.
- By using Plugin
- Manual Compression
Compressing images by using Plugin
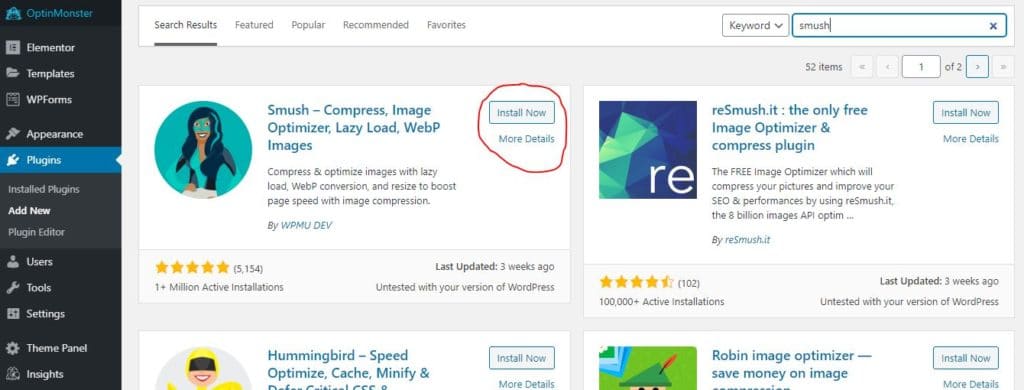
You can use Smush Plugin to compress all images on your website. You can also install this plugin directly from WordPress Plugin directory by going to Plugins >> Add new and search for smush.
Its pro version comes with some more features but to use smush feature of the plugin without limit you can install and activate WP Non-Stop Smushit plugin which can save at least 10 minutes if you have too many images on your website because you will not have to press “smush” button again and again to compress 50 images each time. You can also find this plugin in the WordPress directory.
After installing and activating the above plugins you can go to plugin dashboard by clicking on “Smush” in the sidebar in WordPress dashboard. Here you can click “Bulk Smush Now”. That’s it, you can wait until all images are compressed. You don’t need to enable any other option in this plugin.

Compressing Images Manually
There are chances that plugin might not work for you and even after bulk compression GTmetrix might show recommendation of “optimize images”. So, the best way to optimize and compress images is to do it manually. It will give 100% guaranteed results without using any plugin.
The easiest way is to download all images shown by GTmetrix and upload them on the online tool SHORTPIXEL. We have found it to be the best tool for compressing images without losing quality. We recommend going for “lossy” compression. It will reduce size of images significantly. You can upload 50 images at a time which is more than enough.
After all the images are compressed you can download all the images and upload them to a specific path (as shown by GTmetrix) using File Manager. To make the process easy I recommend the use of File Manager Plugin which can be installed easily from WordPress directory.
After installing and activating the File Manager Plugin you have to open specific folder in for that image and upload the optimized image to replace the older one. Below screenshot will make things much clear:

For instance image with name “your-technology-guide-logo” needs to be optimized according to GTmetix. So we will download this image through this link, upload it to SHORTPIXEL and then download it after compressing. Now we will open the file manager and go to a specific path of image for example in our case public html>>>wp-content>>uploads>>2020>>08 and upload optimized image with the same name here. A dialogue box will appear and you need to click “Yes” for replacing the old image with the optimized image. This process may seem lengthy but it works perfectly.
So, you will score 100 for “optimize images” suggestion on GTmetrix after following the above steps for image optimization.
Scale Images
Scaling Images is another recommendation given by speed tools. It helps in reducing page size by reducing size of image, HTML code and CSS code which was used for scaling images before we scaled it manually.
So, all the process for scaling will be the same as discussed in the above topic for “Compressing Images manually” the only difference will be that you need to resize the image on the online tool PicResize. Here you can select custom size after uploading an image and use the same size as suggested by GTmetrix. After the image is scaled, you can download it. After downloading the scaled images you can use Enable Media Replace plugin to replace existing images by the scaled images by going to the Media Library. You can also use File Manager Plugin but make sure you name each image the same as it was before resizing.
So, you will score 100 now for “Serve Scaled Images” suggestion on GTmetrix.
Use Cache Plugin
Enabling Cache for the pages and posts of website is the main factor which can speed up your site significantly. Enabling cache will reduce the server response time of the website and deliver content quickly from the cache files. Performance of server also has main role in deciding server response time. Using Fast Hosting can significantly improve server response time.
The best cache plugins are WP Rocket (You will get a discount from this Referral Link), WP Fastest Cache, and W3 Total Cache. I would recommend WP Rocket because it’s more user friendly and easy to set up. Just activating WP Rocket will automatically apply most of the optimization steps to speed up your site without breaking any section of the website.
Enable Gzip compression
Enabling Gzip Compression reduces the empty spaces between code written by developers and as a result page size decreases. If you are using WP Rocket then you don’t need to do anything, it will automatically apply Gzip Compression by default. If you are using WP Fastest Cache or any other Cache plugin which does not enable it automatically, you can enable it manually from the settings of the plugin.
Minify HTML, CSS and JavaScript
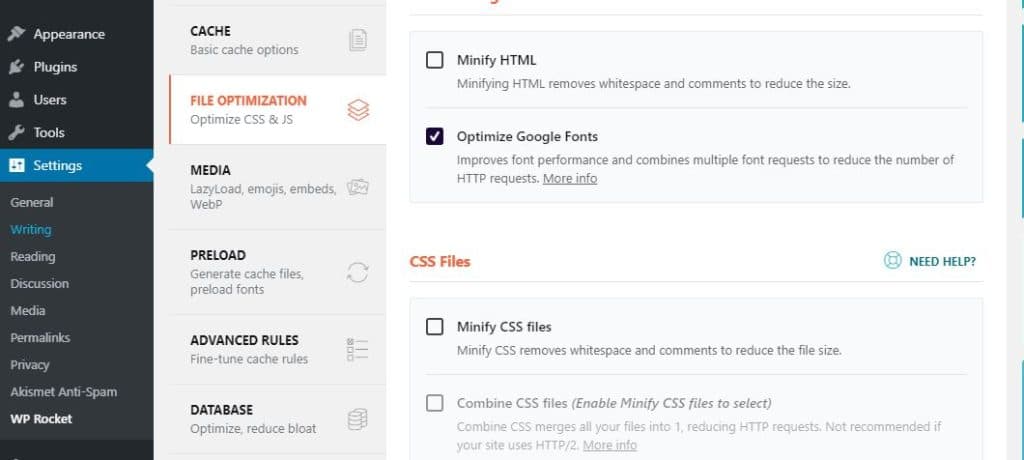
If you are using WP Rocket Plugin for Cache then you can enable all the minification options with just one click. Make sure your website is loading completely without breaking any section after enabling each option one by one.
If you are using a free version of WP Fastest Cache then I would recommend autoptimize plugin for minifying HTML, CSS, and JavaScript. You can also find this plugin in the WordPress plugin repository.
Defer Parsing of JavaScript
WP Rocket has the option to Defer JavaScript in the File Optimization section. It will work perfectly for you.
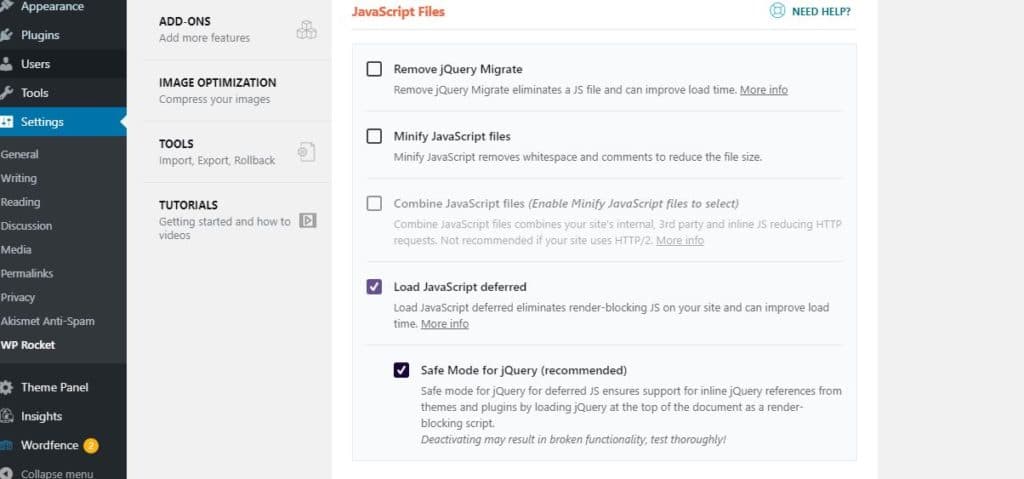
If you are using a free cache plugin that does not defer the JavaScript then you can use Async JavaScript Plugin to defer JavaScript. It also works perfectly and you can choose between the “async” or “defer” method.
Add Expire Headers
This is another recommendation from the GTmetrix which does not affect Page Speed Score but it affects YSlow Score. Expired headers are actually the piece of code which or rule which makes it possible for browser to deliver a cache content for the specific time. After that time cache will expire and browser will again send request.
If you are using any cache plugin then you don’t need to do anything because cache plugin will automatically set expire headers for your website.
SetUp CDN
It is the last step which we will be discussing to speed up your website. CDN stands for Content Delivery Network. As it is clear from name that it works by reducing load on actual hosting and delivers content from its server.
Cloudflare is the best and free CDN which works by serving all the static content through its cache. Cloudflare has Datacenters in more than 90 countries (193 Cities) of the world.
It is user-friendly and easy to setup. You just have to create account and add your domain. After checking DNS you have to use Nameservers provided by cloudflare in domain Registrar account. Cloudflare will be active after 5 to 10 minutes but it can take up to 24 hours to update namservers across all Internet Service Providers so GTmetrix can take time to show CDN.
When Cloudflare is active you can enable further optimization options like Minify HTML, CSS, and JavaScript. If you are using WP Rocket, WP Fastest Cache, or W3 Total Cache you can also integrate Cloudflare with these plugins.
Run Test for your Website After Optimization
Now let’s run test again and see the difference.
We followed the same steps for our website as mentioned above. Here are the results that I got:
GTmetrix Result after Optimization
Pingdom Result After Optimization
Google Page Speed Insights Result After Optimzation
For Mobile
For Desktop
You can let me know about the results you got in comment section 🙂
I hope you have enjoyed the process of speed optimization for your website along with me. If you have any questions, feel free to contact us through the Contact Form. We will reply within 24 hours.